Appearance
New Column
TIP
Make sure you first read the intro to no-code exploration steps
The New Column step is a powerful tool that, as the name implies, always creates new columns in your table (without touching the existing ones, or adding/removing rows).
It can be used to:
- Run calculations based on related data: e.g. for each Account, create a column with that account's "Number of Users". This is exactly what we did in the example above!
- Add related columns from hasOne relations: e.g. for each City, add its Country's name
- Use Excel-like expressions/formulas: e.g. to multiply two numeric columns
TIP
Technical users will feel tempted to think of this in terms of database joins. While Supersimple technically compiles to a SQL query (or several) in the end, we find it helpful to instead focus on the step's semantic intent instead of the implementation detail.
The important thing to note is that the number of rows in the table does not change when applying this step.
Technically, the base table left-joins on the new column's values.

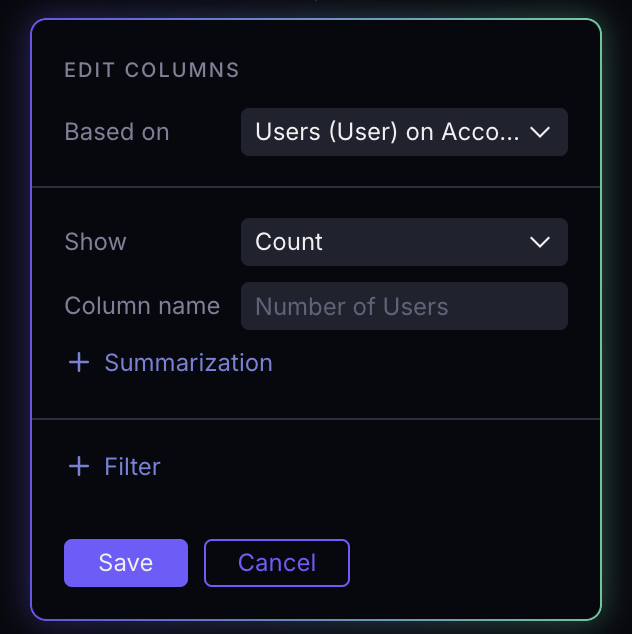
The Based on dropdown lets you choose which relation to use for the calculation/aggregation. In this case, we can choose from the relations that the Account data model has. One of those is called Users, and references the User data model.
Run calculations based on related data
You can use "New Column" to aggregate up data from any hasMany relations.
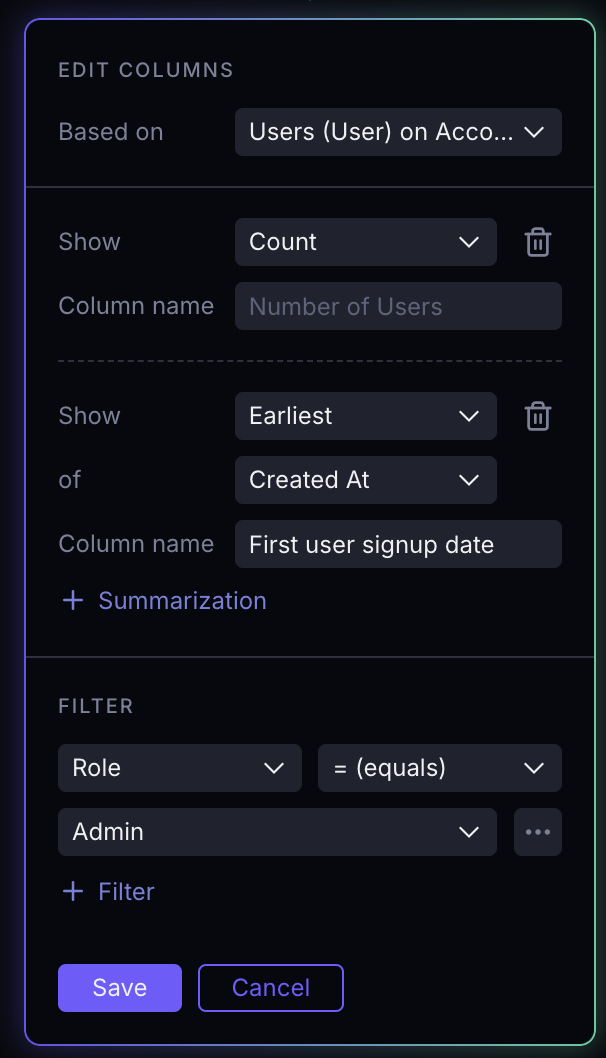
You can also add multiple Summarizations to calculate multiple columns. Filters are applied to any of the related data before aggregating it up. This step would create two new columns, both only considering Role=Admin users:
- "Number of Users" (a number: how many such rows there are)
- "First user signup date" (a date: the earliest "Created At" timestamp from the related Users data)
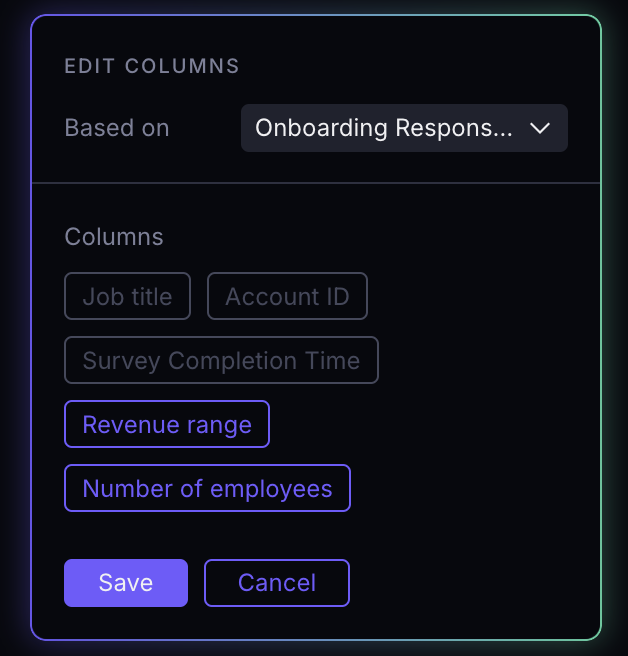
Add related columns from hasOne relations
When selecting a hasOne type of relation from the "Based on" dropdown, you won't need to summarize the data.
Instead, you can choose one or more columns to just "pull in" the values for, creating a new column for each. For example, when starting from Accounts and selecting their Onboarding response related data (which every Account has just 0 or 1 row for), we can add the "Revenue range" and "Number of employees" survey data:
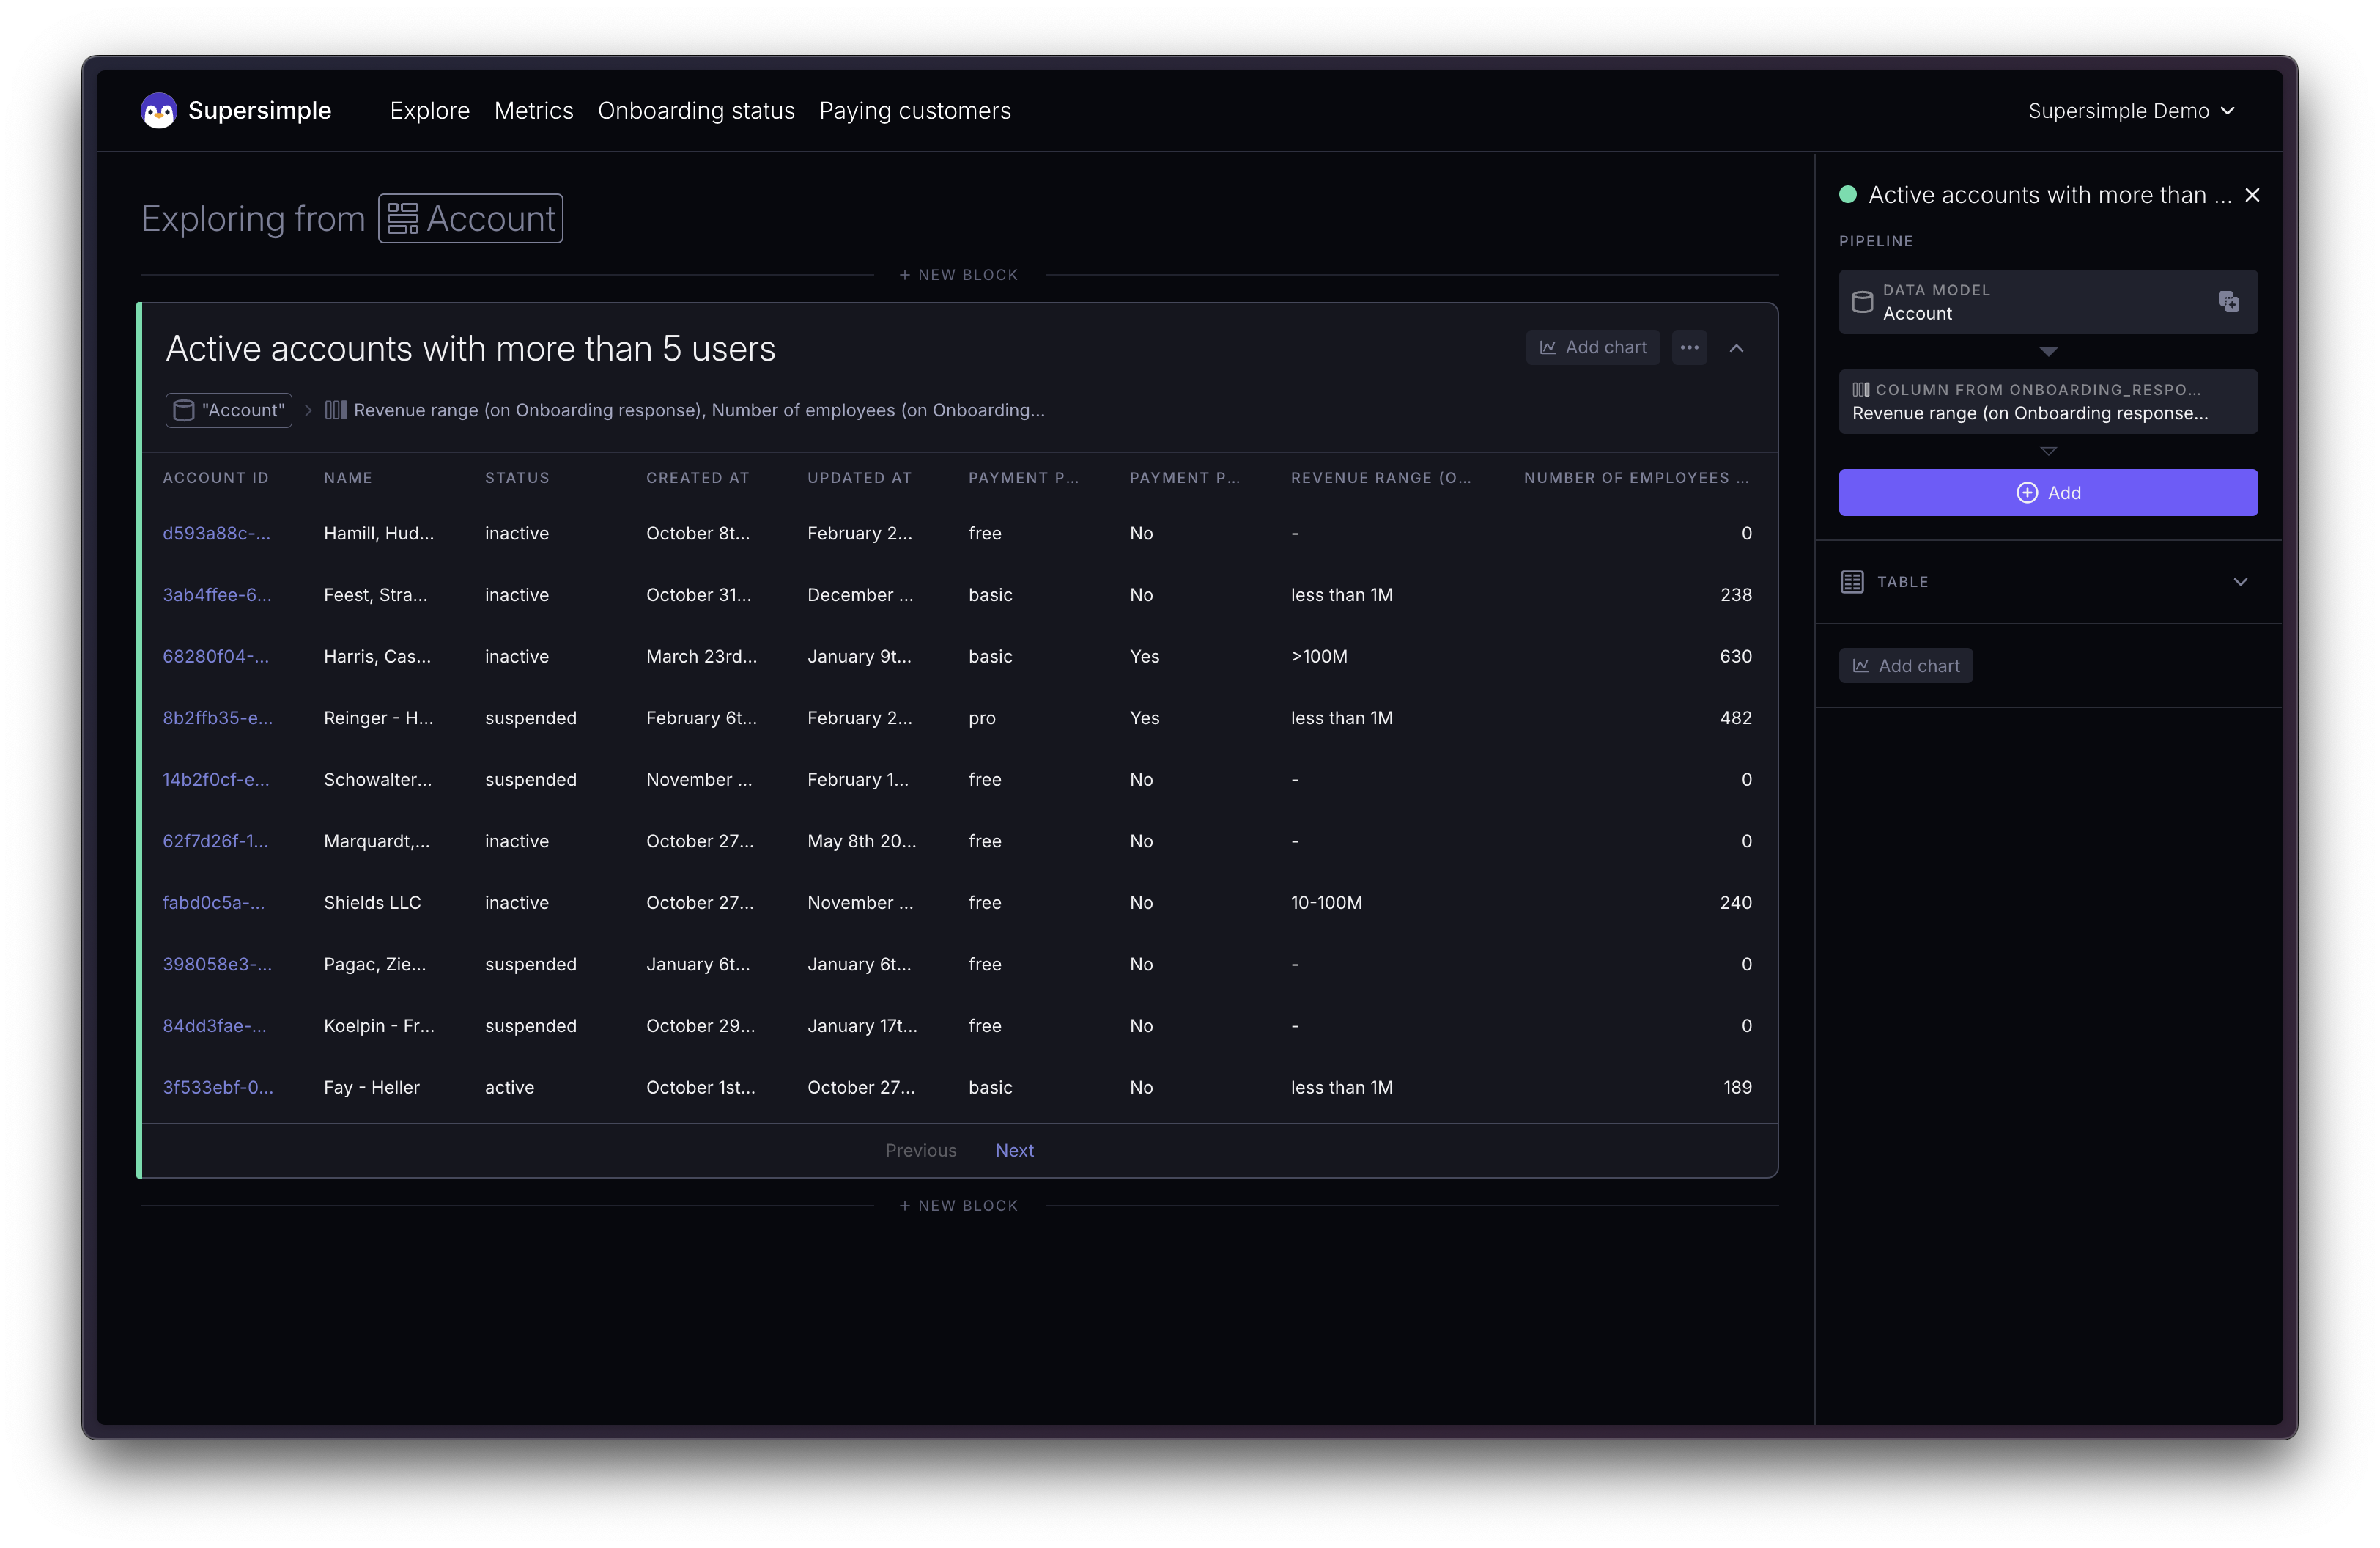
We now have two new columns in our table. Wherever the Account doesn't have an Onboarding Response (remember: hasOne relations have either zero or one matching rows), these fields will be shown as empty (indicated by a dash).
Custom formulas
Custom formulas are a powerful tool for custom calculations and more complex logic. To define a new column through a custom formula, choose Calculation at the top:
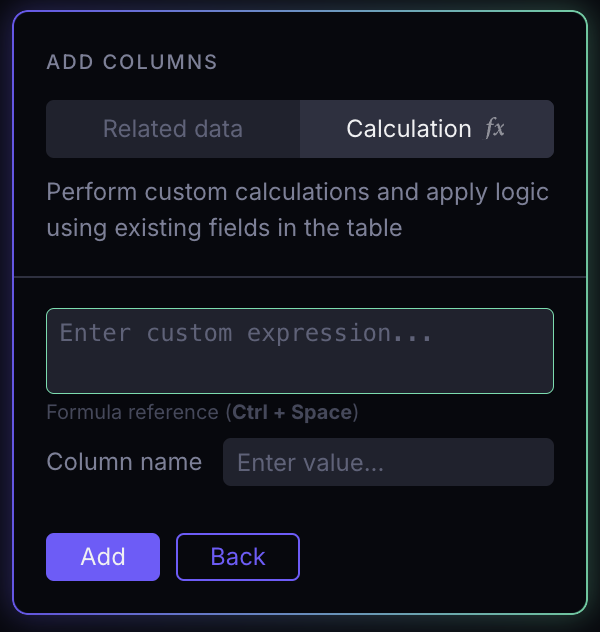
For more information on custom formulas, see our custom formulas reference.
Using On this page blocks
Sometimes it's useful to make some changes to your related data before adding a new column from it. In the Based on dropdown, you can find not only the list of relations itself, but also any On this page blocks that have any of the data models you have relations to.
For exaple, if User has a relation to Account and Account has a relation to Transactions:
- You might want to calculate the largest transaction amount for each Account
- And then show that amount next to each User, based on the Account they are in
To do that, we first prepare the Account data to have a column with the Largest transaction amount. Then, we add a New column to the User block, selecting our newly-created Account with largest transaction data block as Based on.
From there, the existing relation's join logic will be used to add the new column to the User block.